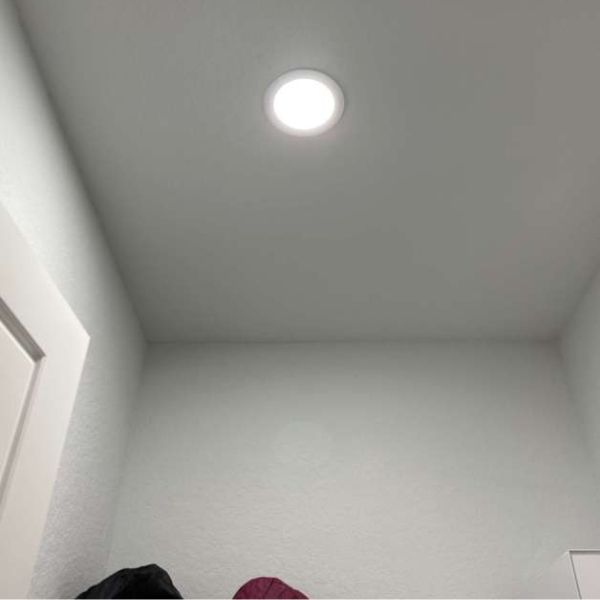
Canless vs. Traditional Recessed Lighting: The New Standard
When comparing canless LED recessed lighting to traditional housings, the shift in modern architecture is undeniable. Traditional “can” lights rely on bulky metal housings that dictate where a light can go. My perspective is simple: canless fixtures win because they prioritize the design of the room over the limitations of the ceiling structure. By utilizing a remote junction box, these systems eliminate the need for a separate “can,” offering a streamlined, high-performance alternative.
The Space Factor: Solving Shallow Ceilings
In many remodel and high-density construction projects, limited plenum clearance makes traditional cans physically impossible to install.
- Ultra-thin wafer lights require as little as 1 to 2 inches of ceiling depth.
- Ideal for basements, multi-family units, and ceilings crowded with HVAC ducts or plumbing.
- Achieves a minimalist, flush-to-ceiling aesthetic regardless of overhead obstructions.
Installation Speed: Direct Mount Efficiency
Labor efficiency is where the remote junction box truly outperforms.
- Traditional Housing: Requires framing-in a large metal box to the joists and complex internal wiring.
- Canless Method: The light connects via a quick-connect cable to a compact driver box that fits through the ceiling cutout.
- Snap-in Clips: High-tension spring clips secure the fixture directly to the drywall, cutting installation time by nearly 50%.
Design Flexibility: Placing Lights Under Joists
The most significant advantage of the canless approach is the freedom of placement.
- No Structural Interference: Since there is no bulky housing, you are no longer forced to offset your lighting layout due to a ceiling joist.
- Symmetry Guaranteed: You can position canless LED downlights exactly where the design demands—even directly beneath a joist—ensuring perfectly aligned grids and superior light distribution.
| Feature | Traditional Can | Canless LED |
|---|---|---|
| Plenum Depth Required | 5″ – 7″ | 1″ – 2″ |
| Mounting | Frame-attached to Joist | Spring-clip to Drywall |
| IC Rating | Varies by Housing | Standard (Direct Insulation Contact) |
| Installation Time | High | Low |
Technical Specs: Pro-Grade Canless LED Recessed Lighting Guide
In our experience, the gap between a “good” light and a “professional” one is found in the technical data sheet. When building out this canless led recessed lighting ultimate guide, we focus on the specs that ensure longevity and visual quality. Generic lights often cut corners on components, but specification-grade fixtures prioritize the hardware that actually impacts your daily environment.
Professional Grade vs. Generic Performance
| Feature | Professional Grade | Generic “Big-Box” Grade |
|---|---|---|
| Color Rendering (CRI) | CRI 90+ color accuracy | CRI 80 (Dull, gray tones) |
| Visual Comfort | UGR < 19 glare control | High Glare (Eye strain) |
| Thermal Management | Die-cast aluminum heat sink | Plastic or thin sheet metal |
| Control Protocols | TRIAC, 0-10V, and DALI-2 | Basic TRIAC only |
The Essentials of Visual Comfort and Build
- CRI 90+ Matters: We believe lighting should make colors pop. High CRI ensures that skin tones, artwork, and decor look exactly as they should. This level of precision is vital for retail store lighting design where color representation directly affects sales and atmosphere.
- Dark-Light Technology: To achieve maximum comfort, we utilize deep regressed optics and COB (Chip on Board) technology. This creates a “dark-light” effect where the light source is hidden, reducing the Unified Glare Rating (UGR) to below 19.
- Heat Dissipation: Heat is the enemy of LEDs. A heavy-duty die-cast aluminum heat sink is essential for pulling heat away from the diodes, ensuring the fixture reaches its 50,000-hour rated lifespan without dimming or shifting color.
Advanced Dimming Protocols
A high-quality dimmable LED driver is what separates a smooth transition from a flickering mess. While most residential projects use TRIAC (leading-edge) dimming, professional and commercial installations often require more robust protocols:
- 0-10V: The standard for commercial spaces, offering flicker-free dimming down to 1%.
- DALI-2: Provides individual fixture control and feedback, perfect for smart building integration and modular track lighting systems that require addressable zones.
- Flicker Management: We ensure our drivers are compatible with major control brands to eliminate the “strobe” effect often found in cheaper canless alternatives.
Choosing the Right Canless LED Recessed Lighting for Your Project
Not all fixtures are created equal. Depending on your ceiling depth and lighting goals, I recommend selecting a specific style of canless led recessed lighting to ensure the best results.
Popular Canless Fixture Types
- Ultra-Slim Wafer Series: These are the ultimate problem solvers for limited plenum clearance. If you have HVAC ducts, pipes, or wiring blocking your path, these ultra-thin wafer lights slide into spaces where a traditional can would never fit.
- Adjustable/Gimbal Downlights: When you need beam angle precision to highlight artwork or accent a wall, gimbals are the way to go. They allow you to tilt the light exactly where it’s needed. For projects requiring even more directional control, many designers also incorporate curve track lighting to complement their recessed layout.
- Trimless Plaster-in Solutions: For a high-end, monolithic look, trimless mud-in downlights are the professional choice. These fixtures are plastered into the drywall, leaving a seamless finish with no visible flange.
- Deep Regressed Optics: To prioritize eye comfort, use fixtures with deep regressed lenses. By tucking the COB (Chip on Board) technology further up into the ceiling, we significantly reduce glare and create a more comfortable environment.
| Fixture Type | Best For | Key Feature |
|---|---|---|
| Wafer | Tight ceiling voids | 1/2-inch thickness |
| Gimbal | Accent lighting | 360° rotation / 30° tilt |
| Trimless | Modern minimalism | Seamless “mud-in” finish |
| Deep Regressed | High-end living areas | Glare-free visual comfort |
Selecting the right housing-free fixture ensures your canless led recessed lighting ultimate guide leads to a successful installation that looks as good as it performs.
Planning Your Layout: The Designer’s Cheat Sheet
Getting the placement right is the most critical step in this canless led recessed lighting ultimate guide. Without a solid plan, you risk “hot spots” or annoying shadows that make a room feel cramped.
The Spacing Rule for Ceiling Height
The standard industry rule is to space your fixtures based on half the height of your ceiling.
- 8-foot ceilings: Space lights 4 feet apart.
- 10-foot ceilings: Space lights 5 feet apart.
- Wall Clearance: Always keep fixtures approximately 2 feet away from walls to prevent harsh light scalloping and glare.
Room-Specific Lighting Needs
Each room serves a different purpose, so your layout should reflect that.
- Kitchens: Prioritize high-lumen output over countertops. Use wafer lights to provide even, shadow-free task lighting.
- Living Areas: Focus on comfort. Using wall spotlights for indoor spaces alongside your recessed grid helps create beam angle precision for artwork and focal points.
- Bathrooms: Ensure all fixtures placed near showers are wet-rated for bathrooms to meet safety codes.
Color Temperature (K) Selection
The Kelvin rating determines the “color” of the white light. We suggest using color selectable (CCT) fixtures so you can test the look in your actual space.
| Application | Recommended CCT | Light Feel |
|---|---|---|
| Bedrooms / Living Rooms | 2700K – 3000K | Soft, warm, and cozy |
| Kitchens / Workspaces | 3500K – 4000K | Neutral, clean, and alert |
| Garages / Laundry | 5000K | Bright daylight for maximum visibility |
Most modern canless units house the toggle switch on the remote junction box, giving you the flexibility to change the mood from “warm” to “cool” without replacing the entire fixture.
Installation Mastery: Setting Up Your Canless LED Recessed Lighting
Installing canless LED recessed lighting is a massive win for both DIYers and pros because it eliminates the need for bulky metal housings. I’ve found that the streamlined process not only saves hours on the job site but also allows for much cleaner finishes in modern spaces.
Essential Toolkit for Seamless Installation
Before you start cutting, make sure you have these basics ready. Having the right gear ensures your ceiling stays intact and your connections are secure:
- Hole Saw or Drywall Saw: Use the template provided with your light to ensure a perfect diameter.
- Wire Strippers: For quick, clean connections inside the junction box.
- Non-Contact Voltage Tester: Safety is non-negotiable—always verify the power is off.
- Tape Measure and Pencil: Precision is key for symmetrical layouts.
The Remote Junction Box Advantage
The real magic of the canless system is the remote junction box. Unlike traditional lights that require a pre-installed “can,” these fixtures connect directly to a small, independent box that tucks into the ceiling plenum.
- Ease of Wiring: You can wire the box before even touching the light fixture.
- Spring Clips: Once wired, the ultra-thin light simply snaps into the ceiling hole using heavy-duty spring clips.
- Versatility: This setup is ideal for remodel projects where attic access is limited or non-existent.
Safety First: IC Ratings and Air-Tight Certifications
When I specify lighting for high-performance projects, including professional store display lighting, safety certifications are the first thing I check.
| Feature | Why It Matters |
|---|---|
| IC (Insulation Contact) Rated | Allows the fixture to be in direct contact with ceiling insulation without a fire risk. |
| Air-Tight Certified | Prevents conditioned air from escaping into the attic, significantly improving energy efficiency. |
| Wet-Rated | Essential if your installation is in a bathroom or outdoor soffit. |
By choosing IC-rated and air-tight fixtures, you ensure your installation is up to code and built for long-term reliability. Whether you are dealing with limited plenum clearance or a standard new construction, these fixtures provide a level of flexibility that traditional cans simply can’t match.
The Prillumen Advantage: Why Specification-Grade Canless LED Recessed Lighting Matters
In a market flooded with cheap plastic alternatives, we focus on architectural quality. Most big-box wafer lights are built for the lowest price point, but our fixtures are engineered for performance and longevity. When you choose specification-grade, you are investing in light consistency and hardware that won’t fail after a year.
- B2B Customization for Large Projects: We understand that commercial developments have unique requirements. Whether it is a specific beam angle or a custom trim color, we provide tailored solutions that generic retailers can’t touch. This level of detail is why our clients often pair our recessed units with track lighting for store designs to create a cohesive, professional environment.
- Architectural Quality vs. Big-Box Wafers: Our canless fixtures use die-cast aluminum heat sinks and premium COB (Chip on Board) technology. This ensures the light remains crisp and the thermal management keeps the driver cool, preventing the flickering common in budget brands.
- Factory-Direct Reliability: By cutting out the middleman, we guarantee that every unit meets strict international certifications. We maintain the same high standards recognized by the top Saudi Arabia lighting companies and global developers who demand “install-and-forget” reliability.
We don’t just supply products; we provide the peace of mind that comes with factory-direct quality control. Our IC-rated and air-tight designs are built to handle the rigors of high-end construction, ensuring your project stays on schedule and up to code.
Maintenance & Troubleshooting for Canless Systems
Maintenance is minimal with these fixtures, but knowing how to handle technical hiccups is part of any canless led recessed lighting ultimate guide. Most issues are easily solved without tearing out your drywall.
Solving Flicker and Dimmer Incompatibility
If your ultra-thin wafer lights start flickering or buzzing, the culprit is almost always the dimmable LED driver or its relationship with your wall switch.
- Dimmer Match: Ensure you are using a digital dimmer compatible with LED loads. Older analog dimmers often cause “shimmering” at low light levels.
- Voltage Drops: If multiple lights on one circuit flicker, check the total wattage against the dimmer’s capacity.
- Technical Standards: We follow strict protocols similar to those found in our supermarket lighting FAQ to ensure flicker-free performance in high-demand environments.
Longevity: Driver vs. Diode Failure
Understanding why a light fails helps you fix it faster. In my experience, 90% of “dead” lights are actually failed drivers, not burnt-out LEDs.
| Component | Lifespan Role | Failure Symptom | Fix |
|---|---|---|---|
| Dimmable Driver | Converts AC to DC | Light won’t turn on or flashes | Replace the driver inside the remote junction box. |
| LED Diodes | Produces light | Gradual dimming or color shifting | Replace the entire light disk (plug-and-play). |
| Heat Sink | Dissipates thermal load | Rapid flickering or premature death | Upgrade to fixtures with a die-cast aluminum heat sink. |
The biggest advantage of the remote junction box is the ability to swap a failed driver in minutes. You simply pull the light down via the spring clips, disconnect the twist-lock cable, and replace the box—no attic crawl required. For wet-rated areas like showers, ensure the seals are intact during maintenance to prevent moisture from reaching the IC rated components.
Canless LED Recessed Lighting Ultimate Guide FAQ
I get these questions constantly from both homeowners and contractors. If you are looking for quick answers to keep your project moving, here is the breakdown of what you need to know about modern canless setups.
Are canless lights safe for insulation contact?
Most high-quality canless fixtures are IC (Insulation Contact) rated. This means the housing and the remote junction box are engineered to stay cool enough that they can be in direct contact with ceiling insulation without any risk of fire. When browsing our professional indoor lighting options, always look for the IC label to ensure a safe, code-compliant installation in tight ceiling voids.
Can I install these without access to the attic?
Absolutely. This is the primary reason why ultra-thin wafer lights have become the industry standard for remodels. Since the fixture is held in place by heavy-duty spring clips, the entire installation happens from below the ceiling.
- Step 1: Cut the hole using the provided template.
- Step 2: Pull your Romex through the hole and wire it to the junction box.
- Step 3: Plug the light into the box and snap it into the ceiling.
No climbing into hot attics or tearing out drywall is required.
Do canless lights need a special dimmer?
Yes, to avoid the dreaded “LED flicker,” you must match the fixture’s driver with a compatible dimmer switch. While many residential models use standard TRIAC dimming, professional-grade or commercial installations often require more robust protocols.
| Dimming Protocol | Best For |
|---|---|
| TRIAC / Phase-Cut | Standard home remodels and simple upgrades |
| 0-10V | Commercial spaces and flicker-free architectural needs |
| DALI-2 | Intelligent building systems and localized control |
Using a high-quality dimmable LED driver ensures smooth transitions and extends the life of your diodes. For projects requiring high precision, we recommend using adjustable lights with precision optics to maintain consistent light quality even when dimmed to low levels.


Leave A Comment