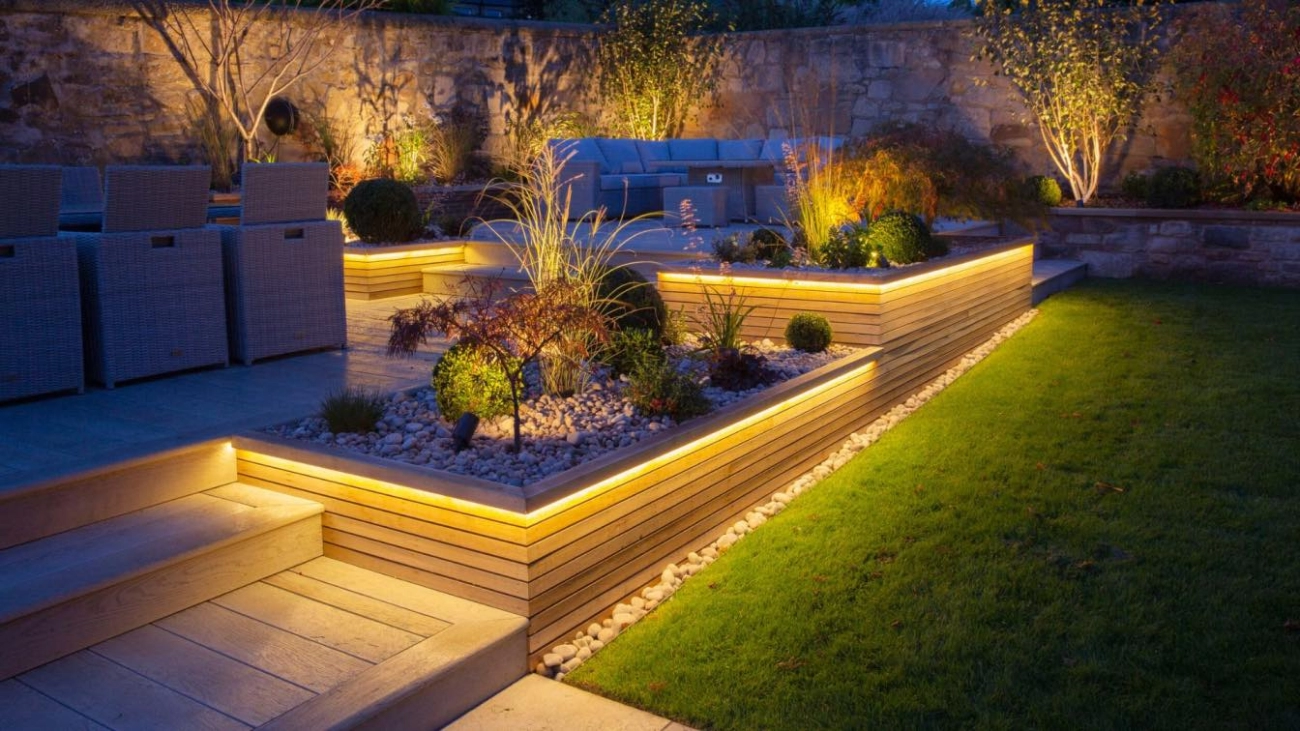
If you’re thinking about installing landscape lighting, you’ve already taken a great step toward transforming your outdoor space. Whether you want to highlight your garden’s beauty, light up pathways for safety, or boost your home’s curb appeal, the right outdoor lighting can make all the difference. But installing landscape lighting isn’t just about putting lights in the ground — it requires planning, the right tools, and a clear understanding of how to wire and position fixtures safely and effectively.
In this guide, you’ll discover everything you need to confidently tackle your landscape lighting installation project — from choosing the best fixtures and creating a design plan, to wiring tips and maintenance advice. Ready to bring your yard to life after dark? Let’s dive into the step-by-step process that will make your outdoor lighting shine bright, last long, and work safely.
Landscape Lighting Basics
If you are thinking about installing landscape lighting, understanding the basics will help you create the right look, stay energy efficient, and ensure your setup lasts for years. Outdoor lighting can be both functional and decorative, enhancing your yard’s safety, security, and beauty after dark.
Types of Landscape Lighting
There are several main types of landscape lighting, each serving a specific purpose:
- Path Lights – Ideal for illuminating walkways, driveways, and garden edges for safe navigation.
- Spotlights – Focused beams that highlight trees, statues, or architectural features.
- Floodlights – Wide beams for security lighting or brightening large areas.
- String Lights – Perfect for outdoor gatherings, decks, and patios for a warm, festive feel.
- Wall Lights – Mounted on walls, fences, or posts to provide ambient or task lighting.
The best landscape lighting setups layer different fixture types to balance ambient, task, and accent lighting across your space.
LED vs Traditional Outdoor Lighting
Today, LED landscape lighting is the preferred choice over incandescent or halogen bulbs because:
- Energy Efficiency – Uses up to 80% less energy.
- Longevity – Can last 25,000–50,000 hours, reducing replacement frequency.
- Durability – Performs well in various weather conditions without frequent burnout.
- Low Heat Output – Safe for plants and outdoor fixtures.
While initial costs for LEDs may be higher, the savings in electricity and maintenance make them a long-term win.
Key Terms to Know for Outdoor Lighting Installation
When shopping for or planning your system, it helps to understand a few essential terms:
- Lumens – Measures brightness. More lumens = brighter light.
- Wattage – The amount of energy a bulb uses. LEDs use fewer watts for the same brightness.
- Color Temperature – Measured in Kelvin (K), defines light appearance:
- Warm (2,700K–3,000K) for cozy ambiance
- Neutral (3,500K–4,000K) for balanced lighting
- Cool (5,000K+) for security or vivid detail
- IP Ratings – Ingress Protection rating that indicates water and dust resistance, crucial for outdoor lights. Example: IP65 means fully dust-tight and resistant to rain jets.
Understanding these basics sets a strong foundation before moving into design, wiring, and installation.
Planning Your Landscape Lighting Installation
Assess Your Outdoor Space and Lighting Needs
Before buying fixtures, walk your property at night and look at how it currently feels and functions. Consider:
- Safety – Are there dark pathways, stairs, or entrances?
- Security – Are there shadowy spots near windows or gates?
- Aesthetics – Do you want to highlight trees, gardens, or architectural details?
- Functionality – Will you host gatherings at night, or do you simply need pathway lighting?
Make notes and photos of key areas needing illumination. This will help you decide where and how much light you actually need.
Create a Landscape Lighting Design Plan
A solid plan prevents wasted time and money. The easiest approach is to think in layers:
- Ambient lighting – Soft overall illumination (string lights, post lights, wall sconces).
- Task lighting – Focused light for activities or safe navigation (path lights, deck lights).
- Accent lighting – Highlighting focal points (spotlights on trees, uplights on walls).
Use your notes from the outdoor walkthrough to map fixture locations and wiring routes. A sketch, even a simple one, helps visualize the end result.
Select the Right Fixtures for Each Area
Different spaces call for different outdoor lighting fixtures:
- Garden – Low-profile spotlights, small path lights, or solar stakes to avoid glare.
- Pathway – Evenly spaced low-voltage path lights for safety and style.
- Deck or Patio – Recessed deck lights, wall sconces, or string lights for welcoming ambience.
Stick to weather-rated fixtures (check the IP rating) suited for your local climate.
Check Local Codes and Safety Rules
Installing landscape lighting can involve electrical work, so it’s important to check your local building codes:
- Some areas require permits for new wiring.
- Always follow National Electrical Code (NEC) standards for outdoor installations.
- If you’re using line voltage lighting, you may need a licensed electrician.
Even for low voltage landscape lighting, you should follow safe wiring practices and use UL-listed products. Your utility company or local building department can guide you on requirements.
Tools and Materials for Installing Landscape Lighting
When installing landscape lighting, having the right tools and materials makes the job faster, safer, and more professional-looking. Here’s a breakdown of what you’ll need before you get started.
Essential Tools
These are the basic tools that most DIY landscape lighting projects require:
- Wire strippers – For removing insulation from low-voltage wires cleanly.
- Voltage tester – To check connections and confirm power is off before working.
- Shovel or trenching tool – For digging shallow trenches to bury cables.
- Screwdrivers and pliers – Handy for assembling fixtures and tightening connections.
- Rubber mallet – Helps stake lights into the ground without damaging them.
Electrical Components
If you’re setting up a low voltage landscape lighting system, you’ll need:
- Low-voltage transformer – Converts 120V household current to safe 12V for outdoor use.
- Outdoor-rated cables – Specifically designed to handle weather and underground installation.
- Weatherproof connectors – Keep water out of wiring junctions.
- Timers or photocells – Automate your lighting to turn on at dusk and off at dawn.
For line voltage setups, additional electrical work may be required, often best handled by a licensed electrician.
Safety Equipment
Outdoor electrical work requires protecting yourself from potential hazards:
- Insulated gloves – To reduce the risk of shock.
- Safety glasses – Protect your eyes from debris while digging or cutting wire.
- Kneepads – Comfort when working at ground level for long periods.
Tip for US homeowners: Always choose outdoor-rated and UL-listed products to meet local building codes and ensure safe performance in varying weather conditions.
Step by Step Guide to Installing Landscape Lighting
Prepare the Site
Before you grab the tools, make sure the area is ready:
- Clear debris and vegetation around where the fixtures will go.
- Mark fixture locations using flags or stakes so your layout is easy to follow.
- If you’re using wired low voltage lighting, dig shallow trenches (about 6 inches deep) for burying the cables. Keep them away from areas where you might dig in the future, like garden beds or fence posts.
Run Wiring Safely and Efficiently
- Measure cable runs to ensure the transformer can handle the total length and load.
- Use low voltage outdoor-rated cable for 12V systems; it’s safer and easier for DIY.
- Lay cables in the trenches but don’t bury them until you’ve tested everything.
- Avoid tight bends or pulling cables too hard—this can cause damage over time.
Install Fixtures
Best practices for placement and mounting:
- Path lights: Space about 6–8 feet apart for even coverage without glare.
- Spotlights: Position them at a 30–45 degree angle to highlight trees, sculptures, or walls.
- Floodlights: Mount higher to wash large areas with light, like driveways or patios.
- Always use weatherproof stakes or mounts and ensure fixtures are stable.
Connect to Power Sources
Low Voltage (12V):
- Use a low voltage transformer connected to a standard outlet.
- Connect cables to the transformer’s terminals, matching polarity.
- Ideal for DIY garden lighting because it’s safer to handle without an electrician.
Line Voltage (120V):
- Requires proper conduit and an outdoor-rated junction box.
- Permits and a licensed electrician are required in most U.S. states.
- Best for large properties or commercial-grade installations.
Test and Troubleshoot
- Turn the system on before burying cables.
- Check each light for brightness and correct placement.
- If a light doesn’t work:
- Check for loose connections.
- Test voltage with a multimeter at the fixture.
- Replace faulty bulbs or connectors.
- Once confirmed, bury the cables, making sure they’re secure but accessible for later maintenance.
Maintenance Tips for Landscape Lighting
Keeping your landscape lighting in good shape isn’t just about keeping it looking nice—it’s about keeping it safe, functional, and cost-efficient over time. With a little routine upkeep, you can extend the life of your fixtures, maintain consistent brightness, and avoid expensive repairs. Here’s a simple breakdown of what I recommend.
Regular Inspection and Cleaning
Outdoor lights are exposed to dirt, debris, and weather, so regular checks are important.
- Inspect fixtures monthly for cracks, moisture buildup, rust, or loose parts.
- Clean lenses with a soft cloth and mild soapy water to keep light output clear and bright.
- Remove leaves, mulch, or grass clippings that may block light or trap moisture.
- For areas prone to heavy rain or snow, verify seals and gaskets are intact to keep water out.
(Tip: If you’re unsure about IP ratings for outdoor lights, here’s a useful resource on the best IP rating for outdoor lighting to help you choose durable fixtures.)
Replacing Bulbs and Repairing Wiring
Even with energy-efficient LEDs, replacements will eventually be needed.
- LED bulbs can last for years, but when they dim or flicker, replace them promptly to avoid stressing the power system.
- For halogen or incandescent systems, check bulbs every season—these burn out faster.
- Inspect wiring for signs of wear, fraying, or exposure. Rodents, lawn equipment, and weather can damage cables.
- Use weatherproof connectors when repairing or extending wire runs for safe, long-lasting connections.
Seasonal Adjustments and Storage
Your lighting needs may shift with the seasons, and some types of lights need to be stored when not in use.
- Adjust fixture angles in winter for lower sunlight and in summer for longer daylight hours.
- Shift focus for seasonal plants and décor changes—highlight blooming areas in spring and fall foliage in autumn.
- String lights or solar lights that aren’t rated for extreme weather should be brought indoors during freezing temps or storms.
- Rechargeable solar lights benefit from being stored in a dry, protected spot during long periods of no sun to preserve battery life.
By maintaining your outdoor lighting system, you keep it working efficiently year-round, avoid costly replacements, and ensure your yard stays safe and welcoming.
Cost Breakdown and Budgeting Tips for Installing Landscape Lighting
When planning your outdoor lighting installation, it’s important to understand the costs involved so you can choose the right setup for your space and budget. Knowing where you can save — without sacrificing quality — will help you get the best long-term value.
Average Costs for DIY vs Professional Installation
- DIY Installation: Most homeowners spend $150 – $500 for a starter low voltage landscape lighting setup. This usually covers a transformer, cables, and 4–8 LED fixtures.
- Professional Installation: Costs can range from $800 – $3,500+ depending on the size of your property, number of fixtures, and complexity of the design. Labor often makes up 40–60% of the total bill.
| Installation Type | Cost Range | What’s Included |
|---|---|---|
| DIY Low Voltage | $150 – $500 | Fixtures, transformer, cable, connectors |
| DIY Solar Lighting | $20 – $50 per light | Fixtures only (no wiring) |
| Pro Low Voltage | $800 – $2,500 | Full design + install labor, fixtures, transformer |
| Pro High-End Design | $2,500 – $3,500+ | Large yard, custom fixture placement, complex wiring |
Material Cost Estimates
- LED Path Lights: $20 – $60 each
- Spotlights/Floodlights: $30 – $100 each
- Low Voltage Transformer: $50 – $200
- Cables and Wiring: $0.50 – $1 per foot
- Connectors and Accessories: $1 – $5 each
Tip: Buy fixtures in multi-packs to save 15–25% compared to buying single units.
Where to Save Without Compromising Quality
- Choose LED over halogen for longer lifespan and lower power use.
- Pick low voltage systems for easier DIY installation and reduced labor costs.
- Use a mix of fixture types — invest more in focal point lighting and choose budget-friendly lights for less-visible areas.
- Purchase from reputable brands during seasonal sales instead of going for the cheapest no-name lights.
Energy Efficiency and Long Term Savings with LED Lighting
Switching to LED landscape lighting not only reduces your electricity bill but also cuts down on maintenance costs.
Why LEDs are cost-effective long-term:
- Energy savings: Up to 75% less energy than halogen.
- Long bulb life: LEDs can last 25,000–50,000 hours (often 10–15 years for outdoor use).
- Lower replacement costs: Fewer bulb changes and reduced electrician visits.
- Cooler operation: Less heat means better safety and fixture longevity.
For most U.S. homeowners, upgrading to LED can pay for itself in as little as 2–3 years through reduced energy and replacement costs.
Why Choose prillumen light for Landscape Lighting
Quality Products Built for Outdoor Use
prillumen light offers a full range of outdoor lighting solutions—from path lights and spotlights to deck and wall lights. Every fixture is designed to handle U.S. weather conditions, with durable housing and high IP ratings for water and dust resistance. Their LED options deliver bright, energy‑efficient light while keeping power costs low.
DIY Friendly Installation Support
For homeowners doing their own outdoor lighting installation, prillumen light makes the process straightforward:
- Step‑by‑step guides for both wired and solar lights
- Clear wiring diagrams for low voltage setups
- Phone and email support from a U.S.-based customer service team
- Video tutorials covering fixture placement, cable routing, and troubleshooting
This means you can handle the project yourself with confidence, whether you’re lighting a garden path or the entire backyard.
Warranty and Reliability
All prillumen light products come with a solid manufacturer’s warranty, giving you peace of mind long after installation. Their fixtures are field‑tested for reliability and meet U.S. electrical safety standards.
Warranty Snapshot
| Product Type | Warranty Period | Coverage |
|---|---|---|
| LED Path & Spot Lights | 5 Years | Fixture and LED performance |
| Solar Lights | 3 Years | Panel, battery, and light output |
| Transformers & Timers | 3 Years | Electrical components and build quality |
Local Availability and Quick Delivery
You can find prillumen light products locally at select U.S. home improvement stores or order online for fast nationwide delivery. That means no long waits for replacement parts or new fixtures—keeping your outdoor lighting project on schedule.


Leave A Comment